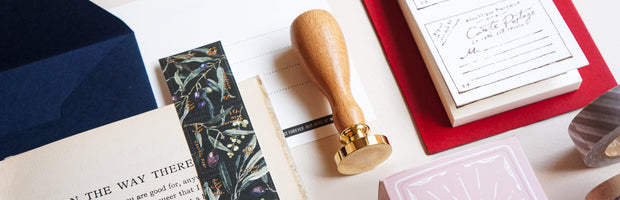
Christmas is the season of giving. Here at our studio, we take gifting seriously like a full-time job (we even made it our full-time job). Ever since we started misterrobinson, we have more resources and reasons to explore the world of gifting. Gift wrap not only serves the purpose of hiding gifts from plain sight, but it can also be done in a way to enhance the excitement of unwrapping. To us, it is simply the perfect time to pull out our wax seal collection and get crafty!
Lately, our way-too-early holiday mood has fueled our sealing creativity and thus we have put together a couple of ways of wax sealing with their step by step instruction to getting you going for this Holiday Season. These little tricks are definitely good throughout the year whenever you need some wax seal therapy, but if you need a little push from us, now is a good time to try incorporating some of these tricks into your gift wrapping craze!
Before we dive into the sealing portion, let us help you narrow down the kind of design you should go with:
For something that represents yourself, many choose to make a mark with their initial. It is also a great way to differentiate your gifts under the Christmas tree assuming no one in your family shares the same initial with you (this trick would definitely not work for half of the Kardashian family).
If you have saved up a year load of craftiness and handmade something for your loved ones, you’d most likely want to give a hint on the gift wrap. The Tailored For You stamp would definitely help you send out the message loud and clear.
If you would like to go one step further and send out good wishes, go with the You Will Shine and the Lighthouse for inspirational vibes, or simply send out some good old Love and Joy that we can never get enough of.
If you simply want to add a wax seal, more generic designs such as the Fleur wax seal stamp and the Wild Flower wax seal stamp are great choices for decorative means!
Now that you have a design in mind, let’s move forward to more the more handy part of this wax seal project:
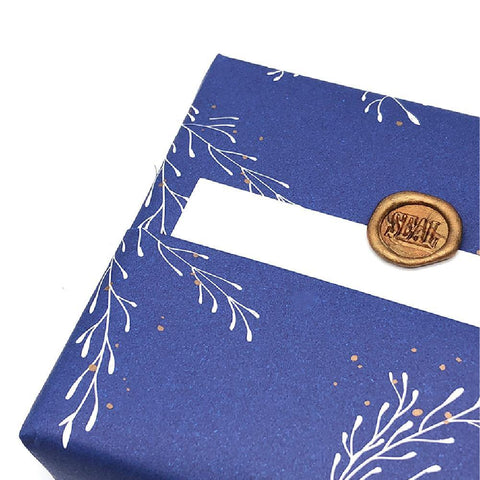
1. The simple seal on the package

Featured here is the Kids Meal seal.
Wax seals are great ways to add texture to an invitation, a letter or a present. You can never go wrong with the good o’ seal on the thread trick.
You need: wrapping paper, ribbon/thread, wax seal stamp, sealing wax, stove + spoon (optional)
Instructions:
-
wrap the present with your choice of paper, go for a less decorative pattern so your wax seal can be the center of attention.
-
tie the package with a ribbon/thread (we LOVE Paperphine Papertwine)
-
melt the wax with the furnace stove and spoon
-
pick a spot on the package where you want the seal, to us that’s the cross-section of the tying thread, to pour the melted wax
-
slowly press the stamp onto the wax to create an impression
-
wait for a minute or two then lift the stamp (you can test whether the seal is ready by carefully touching the wax bleed. it’s ready if it’s cooled)
2. A seal tag

Featured here is the LOVE seal.
Presents don’t always come in a box, it can be in all sizes and forms. There are times when the wrapping paper is unnecessary, and a tag is much more appropriate than an actual seal on the present.
You need: parchment paper, thread/ribbon, toothpick, wax seal stamp, sealing wax, stove + spoon (optional), a piece of cloth (optional)
Instructions:
-
melt the wax with the furnace stove and spoon
-
pour the melted wax onto the parchment paper
-
slowly press the stamp onto the wax to create an impression
-
wait for the seal to completely cool down (takes a minute or two) before lifting the stamp
-
peel the seal off the parchment paper
-
fold the piece of cloth 2-3 times to create a good barrier for your tabletop
-
put the seal on the folded cloth and use the toothpick/needle to poke a hole to your desired spot
-
cut the thread to your desired length
-
pull the thread through the hole on the seal
-
tie a knot to hold the seal in place
-
tie the seal onto your present
3. A seal charm

Featured here is the Bunny seal.
This is actually an upgraded version of the seal tag, that requires a little more tools for a more polished result. We find it to be a great add-on for a small Christmas tree if you find it too empty.
You need: parchment paper, thread/ribbon, hole punch, eyelet pliers, grommet, wax seal stamp, sealing wax, stove + spoon (optional)
Instructions:
-
repeat step 1-4 from the Seal Tag
-
punch a hole on the seal (find a place where a hole will not affect the whole aesthetic of the seal)
-
put the grommet on the hole with the ringside facing up
-
set the grommet with the eyelet pliers
4. A sealed message card

Featured here is the mini SEAL seal.
While you can always opt for a Christmas card, sometimes a message card wrapped with the present can be a good option in times when you simply forgot to get the Christmas card. The message you want to deliver is way more important than the card choose to write it on after all.
You need: message card, wrapping paper, parchment paper, wax seal stamp, sealing wax, stove + spoon (optional)
Instructions:
-
prepare a message card
-
measure extra wrapping paper so you can fold a pocket for the message card
-
place the message card on top of the wrapping paper, fold the paper up along the bottom of the card and fold it down to create the depth of the pocket (we leave approximately 1/3 of the message card shown as we will be creating a seal on the border of the card)
-
wrap the present with the folded wrapping paper
-
place the message card on top of the parchment paper
-
melt the wax with the furnace stove and spoon
-
pour the wax on to the middle of the message card border
-
slowly press the stamp onto the wax to create an impression
-
wait for a minute or two for it to completely cool down before you lift the stamp
-
remember to write an actual message before inserting the card into the pocket and giving it away!
We hope these little tricks have given you some inspiration as to what to do when you are faced with a gift wrapping task. When it comes to wax seals, the possibility is endless when we try to think out of the box, so we encourage you to also get creative and explore your own ways around the fun of sealing wax!